
How to Play Fingerstyle Ukulele: A Complete Technique Guide
Fingerstyle ukulele is built from a collection of small movements that work together. The way your fingers contact the strings, how your left hand places and releases each note, and how you shape the sound all contribute to the music you create. As these movements become more natural, they begin to disappear into the background, allowing you to focus less on the mechanics of playing and more on the music itself.
That doesn’t happen by learning one technique in isolation. A beautiful melody depends on both hands working together. A smooth chord change begins long before the fingers move. Even something as simple as where your right hand touches the string can completely change the character of the sound.
Whether your goal is to play classical repertoire, Hawaiian music, blues, folk arrangements, or your favorite songs, the same foundations support everything you play. This guide brings together the essential techniques of fingerstyle ukulele and shows how they fit together. Throughout the guide, you’ll also find links to more detailed lessons where you can explore each technique through demonstrations and guided exercises.
Before we get started, don’t forget to download our free fingerstyle book, Selected Solos for Fingerstyle Ukulele. The book features six fingerstyle pieces in different styles including classical, blues, Hawaiian, traditional folk, and holiday in easy-to-read notation + TAB format.
Here are the pieces you can learn to play in this fun collection:
- Für Elise by Ludwig van Beethoven
- Greensleeves (traditional English)
- Aloha ʻOe by Queen Liliʻuokalani
- Malagueña (traditional Spanish)
- Study No.25 by Fernando Sor
- Delta Blues by Jeff Peterson

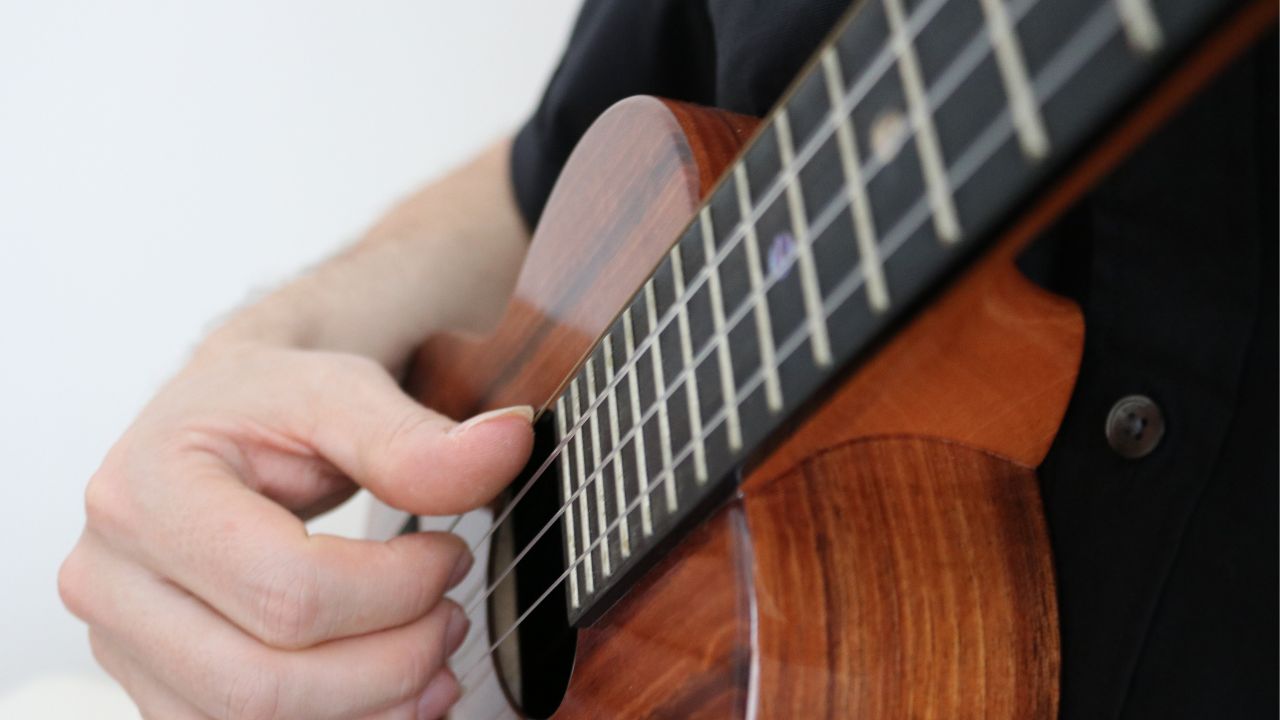
The Right Hand
The right hand is responsible for producing every sound on the instrument. It determines the quality of your tone, the balance between melody and accompaniment, the shape of an arpeggio, the direction of a phrase, and even the character of a repeated section. Although there are many techniques to learn, they all grow from the same basic ideas: relaxed movement, consistent contact with the string, and careful listening.
The Thumb
For many players, the thumb is the first step into fingerstyle playing because it moves so naturally between melodies and chords. Rather than thinking of it as only a strumming finger, learn to use it as a melodic finger as well. Practice playing individual notes on each string with the thumb, then move comfortably between single notes, small groups of strings, and full chords.
As your control improves, begin aiming deliberately for different string groups instead of simply sweeping across the instrument. This ability to target one string, two strings, or all four becomes especially valuable in chord-melody playing, where the thumb often alternates between carrying the melody and supporting it with bass notes or chords.
If you’d like to develop this technique further, dive deeper with our lesson on thumb technique.
Alternating the Fingers
Once the thumb feels comfortable, the index and middle fingers open another world of possibilities. Alternating these fingers allows one finger to prepare while the other finishes its stroke, creating a smooth, continuous motion that works well for scales, melodies, and many fingerstyle passages.
A good way to develop this coordination is by beginning with detached notes. Playing staccato helps you focus on the movement itself without worrying about connecting the notes. As the alternation becomes more comfortable, gradually allow the notes to flow together into a more legato sound while keeping the same relaxed motion.
You can also experiment with different rhythmic groupings. Accenting notes in groups of two or three changes the feel of an exercise without changing the notes themselves, strengthening both your rhythmic control and your finger independence.
Explore these ideas in more detail with our lesson on staccato, alternation, and speed.
Bringing the Right Hand Together
The thumb, index, middle, and ring fingers each have their own role, but they become far more powerful when they work together. You might use the thumb to carry a melody while the fingers provide harmony, play a block chord with all four fingers together, or separate that same chord into a flowing arpeggio.
You can also move naturally between fingerstyle playing and strumming without changing your basic hand position. Sometimes a phrase calls for a warm thumb melody, while the next measure asks for a bright strum or a series of alternating fingers. The more comfortable each movement becomes on its own, the easier it is to combine them into a single musical phrase.
Watch our lesson on right-hand versatility to explore these possibilities in greater detail.
Producing a Beautiful Tone
Every note begins before the string is released.
Instead of striking the string from a distance, let the finger settle naturally onto it first. Feel the contact with the string, apply gentle pressure toward the soundhole, and then release the note while allowing the finger to continue its motion toward the palm. Thinking of the stroke as contact, pressure, and release encourages a fuller, more controlled sound than simply pulling outward on the string.
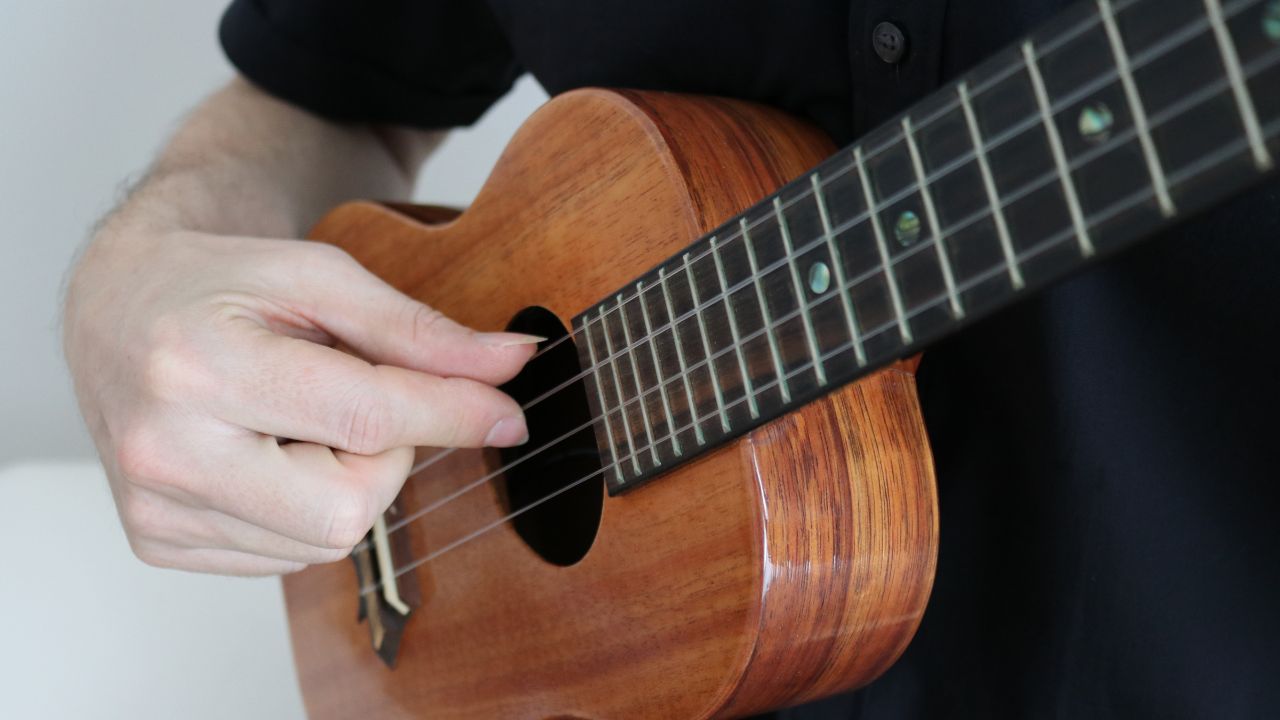
The point where the finger contacts the string also matters. Many players use a combination of fingertip and nail, allowing the flesh to begin the stroke before the nail completes it. This produces a clear tone while reducing unwanted clicking and helping each note sound more consistent.
Your thumb offers additional colors. Playing with the flesh alone creates a warm, mellow sound, while incorporating the nail adds brightness and projection. Neither approach is universally better. The music often tells you which sound is most appropriate.
Dive deeper into these ideas with our lessons on how to get a nice sound on ukulele and the secret to good sound on ukulele.
Free Strokes and Rest Strokes
Most fingerstyle playing uses a free stroke, where the finger releases the string and continues past it without touching the next string. A rest stroke follows a different path. After playing one string, the finger comes to rest against the next string, allowing more weight to travel into the note.
Because of this additional weight, a rest stroke naturally brings a note forward. It can be especially effective whenever you want a melody to sing above its accompaniment. Free strokes remain the foundation of most fingerstyle playing, but learning to use a rest stroke at the right moment gives you another way to shape a musical phrase and direct the listener’s ear.
Learn when and how to use this technique in our lesson on rest stroke on fingerstyle ukulele.
Block Chords and Arpeggios
Whether you’re playing a chord all at once or one note at a time, the preparation is the same. Place the thumb, index, middle, and ring fingers on their assigned strings before playing so each finger already knows where it is going. Feeling the strings before releasing them encourages a relaxed, balanced hand and helps every note begin from the same position.
When all four fingers release together, they produce a block chord. Releasing them individually transforms that same chord into an arpeggio. Because the hand begins from the same balanced setup, moving between these textures becomes much easier.
As the movement becomes comfortable, experiment with where you place the emphasis. Accenting the thumb creates one rhythmic character, while shifting the accent to the index, middle, or ring finger changes the shape of the phrase without changing any of the notes. This simple idea can dramatically change the feel of an accompaniment pattern.
Continue with our lessons on block chords and basic arpeggiation and accenting with arpeggios to develop these techniques further.
Making the Melody Sing
One of the defining characteristics of fingerstyle ukulele is the ability to play a melody and its accompaniment at the same time. When every note receives the same weight, those musical lines begin to blend together. Instead, think of the melody as a singer standing in front of an ensemble. The accompaniment should support the melody without competing for attention.
You can achieve this by placing a little more weight into the melody note before releasing it while allowing the accompanying notes to remain lighter. As the melody moves from one finger to another, the same idea travels with it. Sometimes a rest stroke can provide additional emphasis, but careful control of volume alone often creates enough contrast for the melody to emerge naturally.
See this demonstrated in our lesson on making melodies sing on ukulele.
Tone Color
The notes on the page may remain exactly the same, but moving your right hand to a different part of the string can completely change how those notes are perceived.
A normal playing position near the soundhole produces a balanced tone suitable for most music. Moving toward the fingerboard creates a warmer, sweeter sound, while playing closer to the bridge produces a brighter tone with more upper overtones. These subtle changes become powerful musical tools when repeating a phrase or highlighting a new section of a piece.
Rather than treating tone color as a special effect, think of it as another part of musical expression. Sometimes changing where you play the string is all that’s needed to give a familiar phrase a completely different character.
Explore these tonal possibilities further in our lesson on tone color on fingerstyle ukulele.
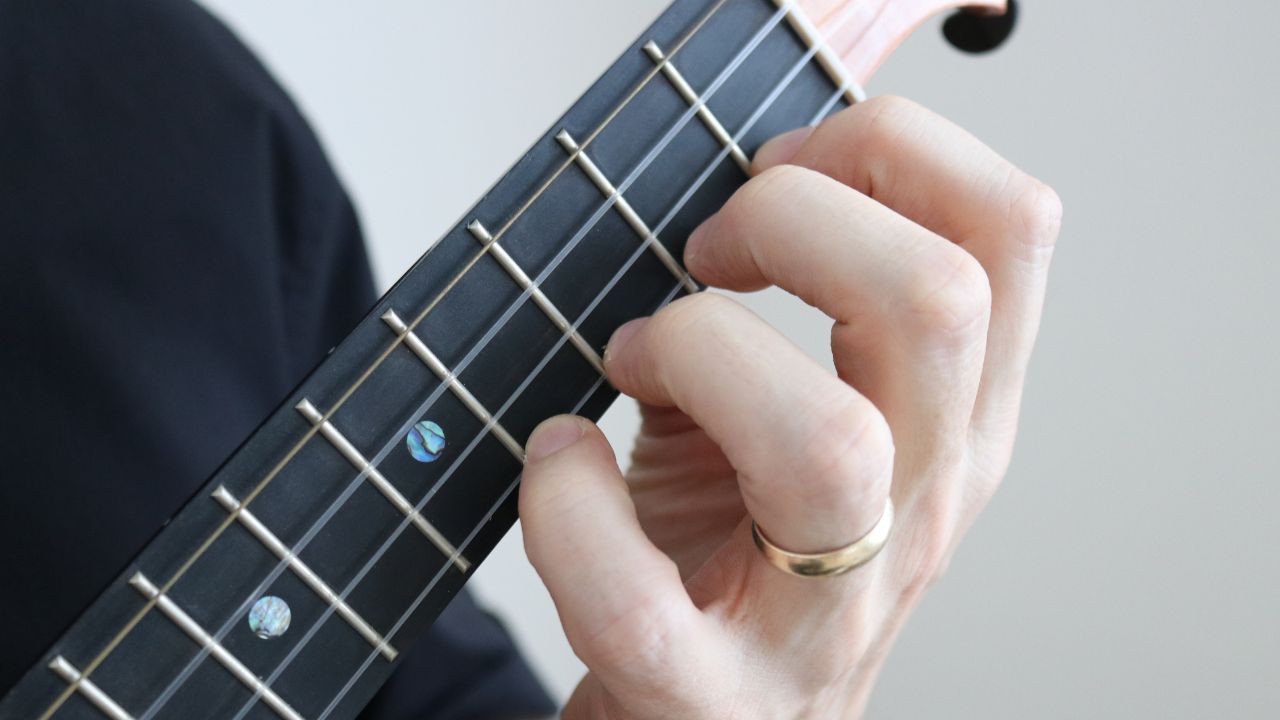
The Left Hand
While the right hand creates the sound, the left hand determines how clearly that sound speaks. Every note depends on accurate finger placement, balanced movement, and knowing when to hold a note, when to release it, and how to move efficiently to the next one.
Many left-hand problems aren’t caused by a lack of strength. More often, they come from using more movement than necessary. As you become more aware of how each finger approaches and leaves the string, you’ll find that your playing becomes cleaner, smoother, and more relaxed.
Finger Placement
Clear notes begin with clear finger placement. Rather than placing your finger in the middle of the fret space, aim to place it just behind the fret wire. This allows the string to vibrate cleanly with less pressure, making it easier to produce a clear note without squeezing the neck.
You can experiment with how much pressure is actually needed. Play a note, then gradually reduce the pressure until it begins to buzz. From there, add only enough pressure to restore a clear sound. Many players discover they have been pressing much harder than necessary, creating extra tension that makes shifting and stretching more difficult.
The thumb also plays an important role. As your fingers move across different strings, allow the thumb to remain balanced behind the neck rather than gripping tightly. It supports the hand without becoming a source of tension.
Dive deeper into these ideas with our lesson on perfect finger placement on ukulele.
Choosing Efficient Fingerings
The fingering that works best for one chord or melody may not be the best choice when that same passage appears in a different musical context. Rather than thinking of fingerings as fixed shapes, think of them as ways to prepare for what comes next.
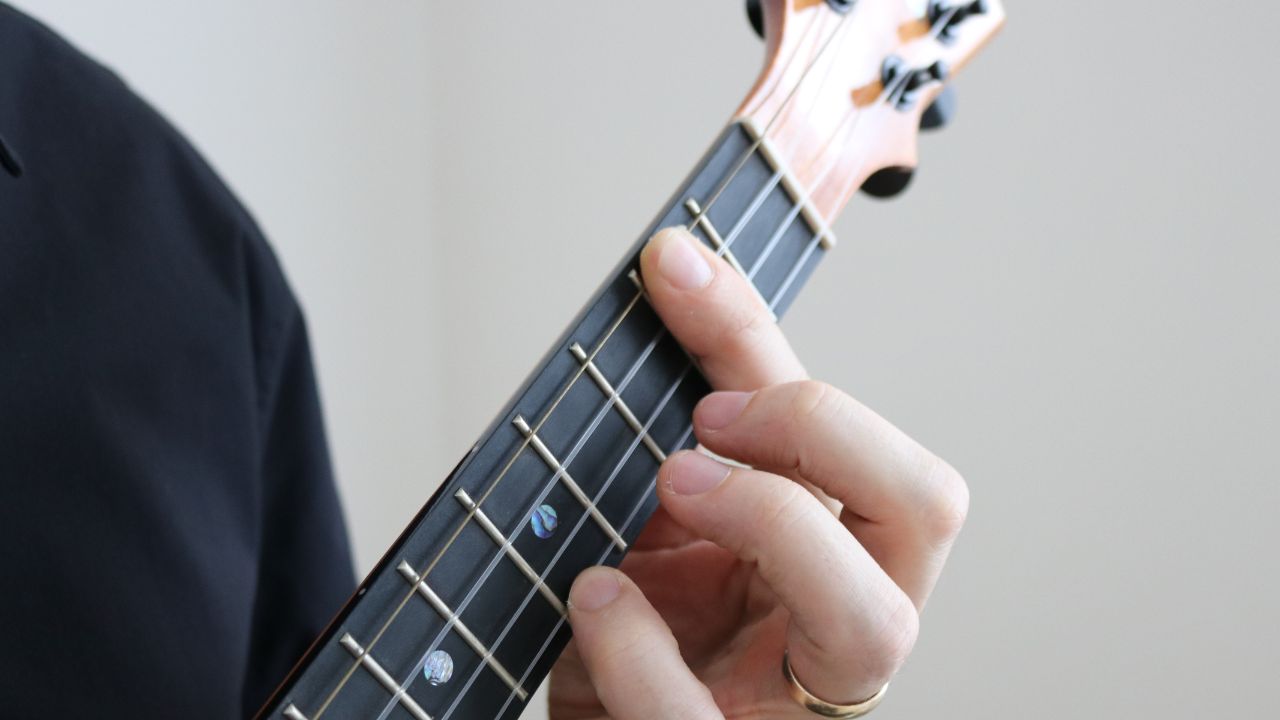
Sometimes the smoothest movement comes from leaving one finger in place while the others move around it. Other times, placing one finger before the rest of the chord allows the music to continue flowing naturally without rushing to form the entire shape at once. Looking ahead to the next measure often reveals a simpler solution than treating every chord as an isolated event.
As you gain experience, you’ll begin recognizing guide fingers, common shapes, and opportunities to reduce unnecessary movement throughout a piece.
Explore this approach further with our lesson on left-hand fingerings.
Stretching Comfortably
Large stretches should feel like an expansion of the hand rather than a struggle against it. Instead of reaching outward with every finger equally, allow the hand to open naturally by extending the index finger while keeping the pinky comfortably curved. This creates more distance between the fingers without flattening the hand or introducing unnecessary tension.
The position of the thumb contributes to this movement as well. Keeping it balanced behind the neck gives the fingers room to expand while maintaining control of the instrument. When the thumb begins to squeeze or drift too far from the neck, the rest of the hand often follows.
Stretching exercises aren’t simply about increasing flexibility. They also help you recognize how little effort is actually needed to reach comfortably across the fingerboard.
Learn this movement in more detail with our lesson on left-hand finger stretch on ukulele.
Keeping the Fingers Close
Watch experienced players and you’ll often notice that their unused fingers stay surprisingly close to the strings. They don’t fly away from the fingerboard between notes because every extra inch the finger travels must eventually be recovered before it can play again.
Keeping the fingers gently curved and close to the strings shortens that journey. The result is cleaner playing, greater accuracy, and less effort, particularly in passages that move quickly between notes or chord shapes.
This doesn’t mean holding the hand rigid. The fingers should remain relaxed and ready to move, simply avoiding unnecessary motion that doesn’t contribute to the music.
Practice this idea further with our lesson on fixing flyaway fingers on ukulele.
Smooth Chord Changes
Smooth chord changes begin before the previous chord has finished sounding. Rather than lifting every finger together and then searching for the next shape, allow each finger to move only when it needs to.
In many passages, particularly those built from arpeggios, the entire chord doesn’t have to appear at once. Place the first finger when its note is needed, then allow the remaining fingers to arrive naturally as the music unfolds. This approach reduces hurried movement and often allows notes from the previous chord to continue ringing, creating a more connected musical line.
As you practice, look for opportunities to leave guide fingers in place whenever possible. Even one finger remaining on the string can help orient the hand and make the next chord feel much more secure.
See this approach demonstrated in our lesson on smooth chord changes on ukulele.
Releasing Notes Cleanly
Playing a note cleanly is only half the job. Releasing it cleanly is just as important.
One common source of unwanted noise occurs when a fretting finger lifts quickly away from the string, accidentally sounding the open string beneath it. Instead of pulling directly away, think of the release as a two-step motion. First, reduce the pressure while maintaining contact with the string. Once the pressure has been released, allow the finger to leave the string.
This movement happens quickly in real music, but thinking of it as two separate actions helps eliminate unintended pull-offs and keeps the left hand quiet as you move through scales, melodies, and chord changes.
Like many aspects of technique, the goal isn’t to move more slowly. It’s to move with greater control.
Dive deeper into this technique with our lesson on lifting fingers without noise on ukulele.
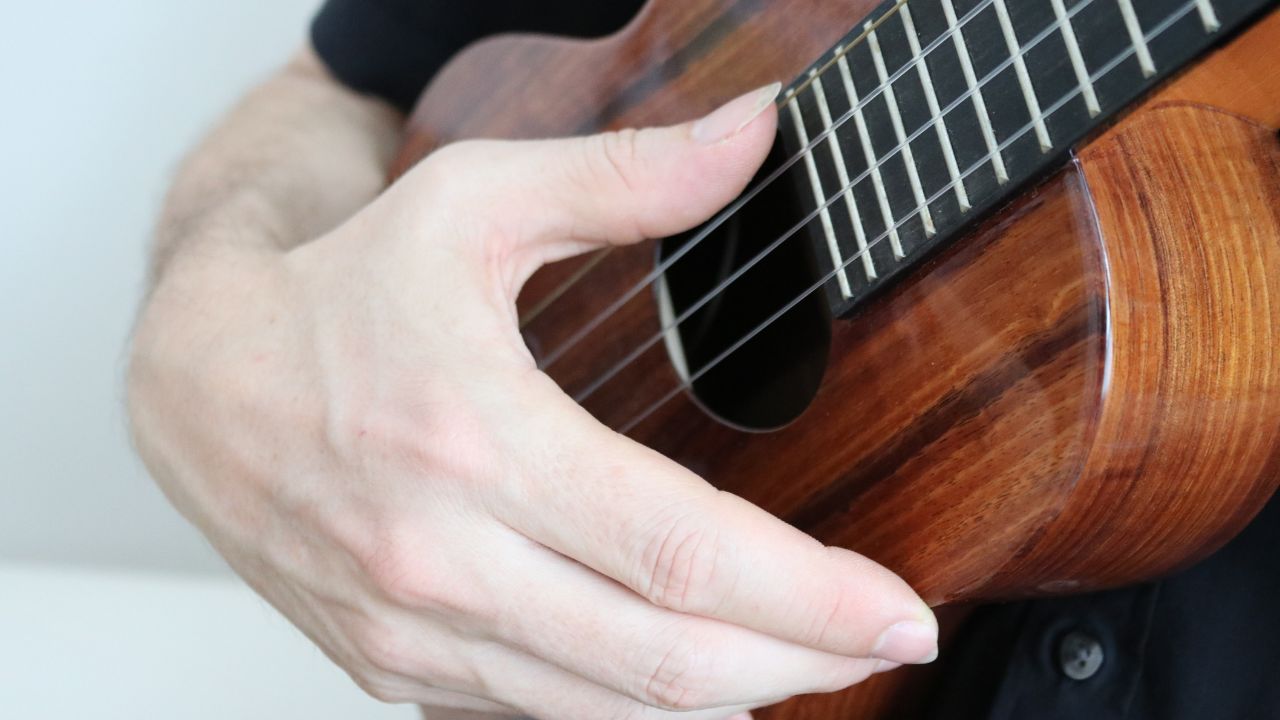
Strumming
Although fingerstyle ukulele is often associated with individual notes and arpeggios, strumming remains an essential part of the style. Many arrangements move naturally between fingerpicked passages and strummed chords, and developing a relaxed, controlled strum gives you another way to shape the music.
The same principles you’ve already explored still apply. Good tone comes from relaxed movement. Accents create rhythmic direction. The position of the hand changes the color of the sound. Rather than learning a completely different technique, you’re simply applying familiar ideas in a new way.
Smooth Strumming
A relaxed strum begins with the forearm rather than the fingers alone. Instead of forcing the motion from the wrist or elbow, allow the forearm to rotate naturally while the index finger passes smoothly across the strings. This creates an even stroke that can easily adapt to quarter notes, eighth notes, sixteenth notes, and more complex rhythms.
Once the basic motion feels comfortable, begin experimenting with accents. Changing which beats receive a little extra weight gives familiar rhythm patterns new energy and helps develop greater rhythmic control. Even a simple pattern can sound completely different when the accents shift to unexpected places.
As your confidence grows, allow the motion to become lighter and more continuous. Smooth strumming isn’t about moving faster; it’s about removing unnecessary tension so the hand can move freely.
Continue with our lesson on how to strum smoothly on ukulele.
Rasgueado
Rasgueado introduces another way of approaching the strings. Instead of moving across them with a single finger, each finger releases in succession to create a rolling strum. This technique has its roots in Spanish guitar traditions and produces a bright, energetic sound that contrasts beautifully with more delicate fingerstyle textures.
The movement develops gradually. Begin slowly, allowing each finger to release independently while keeping the hand relaxed. As the fingers become more coordinated, the separate movements begin to blend into a continuous roll. Like many techniques, speed develops naturally from consistency rather than force.
Even if you don’t regularly play music that calls for rasgueado, practicing the movement encourages greater independence throughout the right hand and can improve your overall control.
Explore this technique in our lesson on rasgueado strumming on ukulele.
Bringing It All Together
Every technique in this guide serves the same purpose: helping you make music more naturally and expressively.
The right hand gives each note its tone, direction, and character. The left hand provides clarity, connection, and efficiency. Strumming, arpeggios, melodies, and accompaniment all grow from the same small collection of relaxed, coordinated movements.
You don’t need to master everything at once. Instead, listen carefully to your playing and let the music guide your practice. If a melody disappears beneath the accompaniment, spend time working on balance; if chord changes feel rushed, look at how your left hand prepares the next shape; if your tone sounds uneven, return to the basic motion of contact, pressure, and release.
Over time, these individual techniques stop feeling like separate skills. They become part of a single musical vocabulary that allows you to focus less on how you’re playing and more on what you want the music to say.
Whether you’re learning your first fingerstyle arrangement or refining repertoire you’ve played for years, these fundamentals continue to support everything you do. Return to them often, explore the lessons linked throughout this guide, and allow each technique to become another tool for expressing your own musical voice.




Aloha Jeff,
This is great. Lot to learn and review.
The link to download the solo book seems to not work.
Thanks,
Mike
Aloha Mike,
Try this link:
Fingerstyle Book
or the book page at UC:
https://ukulelecorner.com/books/
Hi Mike,
If you reach out to us at support@ukulelecorner.com we can attach the book directly in an email if you’re having trouble. Everything seems to be working correctly on my end from the above link. Thanks and best wishes.
Peace,
Dave B (UC team)